How To Repair Water-Damaged Drywall?
Whether it occurs in your ceiling because of a leaky roof, condensation from your air conditioning, or flooding, restoring water-damaged drywall can make you stress and worry, particularly if you've never done it previously. After all, the ceilings and walls in your house are supposed to be strong and safe, and cutting a hole into one should be really complex. It's really far from the Truth, the process will take some prep work and create a bit of a mess, however with a little patience and care you can perform the damage nearly invisible in only a few days.
Determining water damage to drywall
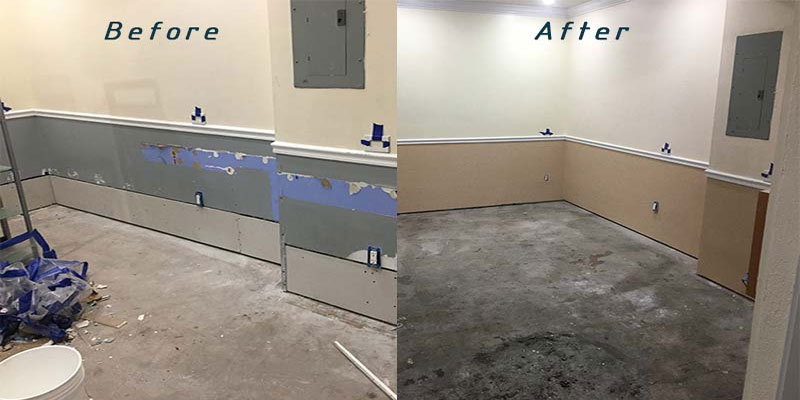
Because the drywall is penetrable and dissolvable in water, making it wet can turn into a major problem. Wet drywall will absorb water and become heavy to pull off from screw or nails that hold it in place. In the event where drywall does get wet and just starts to fall before drying out, repairing it might require forcing it back into place, fastening it with new screws, and later painting over it with paint.
However, if the drywall gets soft, then it's most likely will break and the paper will separate when it dries. In this case, you'll require to cut out these water-damaged parts as soon as possible.
Soaked drywall absorbs water, so it's also an attraction for mold. The moisture creates a perfect environment, and mold develops on the paper. So in case you're cleaning up a leak in your attic or a flood, you want to fix the water damaged drywall as soon as possible. Additionally, you want to make sure that the damaged area is completely dry before you start patching and repairing.
Because mold can be a severe health hazard, it's not uncommon in cases when flooding is less than one foot to remove up to 18 inches of drywall. However, FEMA suggests that in case the water level was less than 2 1 feet, the drywall material should be removed to a height of 4 feet. In case the water level was higher than 2 1 feet, the drywall material should be removed to a height of 8 feet.
Cut out the damaged wall area
When you're cutting the damaged section, it's a good approach to cut it out as a rectangle or square. While this normally increases the area size you require to replace, this makes it simpler to cut and fit pieces. Additionally, it makes the plastering and taping work simpler to blend in with the rest of the area.
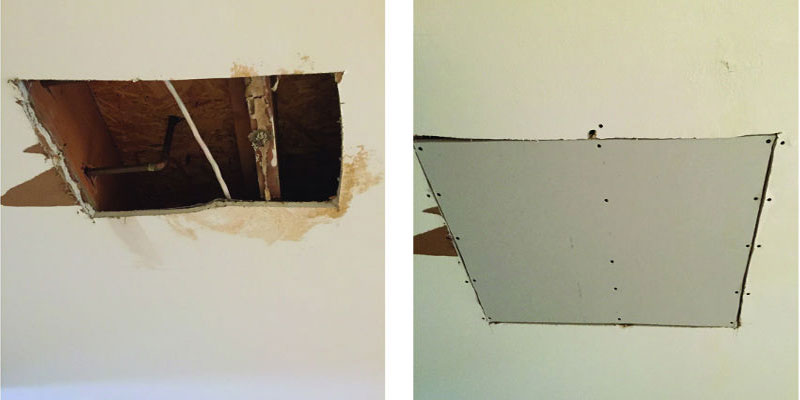
Measure & install replacement sections
After cutting the damaged drywall, measure the area of the opening so you can cut out a piece from a new sheet of drywall. Set four drywall clips around the opening. Tighten each one in place with a drywall screw, assuring to countersink the screw head. Be mindful not to overdrive the screw. Cut out the piece and install it, then fasten it to the drywall clips (or any available ceiling beams) using drywall screws. Be mindful not to over-tighten.
In case you are changing a large section of water damaged drywall, you'll require to cut out any openings for outlets before you connect the board to the wall. When you are preparing large repairs, understand that drywall comes with a bound side and a butt side. The bound edge is thinner than the remainder of the sheetrock. By decreasing the thickness, it's more comfortable to cover long taped joints under several coats of joint compound. The butt edges at each end of the sheetrock are as thick as the remainder of the sheetrock.
Blend the seams & paint
Tape up the seams with either paper or mesh tape. Though mesh tape seems to be more comfortable because it is self-adhesive, drywall installers favor paper tape. Working with paper tape demands some practice and little delicacy, but it's completely worth learning. Apply the first layer of compound or "mud." Then spread the mud out about 6 inches from the end of the repair section. Allow this coat to dry completely then sand off any elevations. Make sure to use a dust mask.
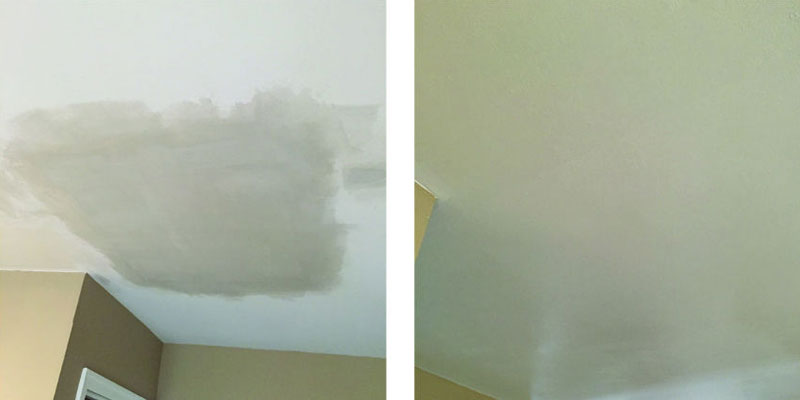
Wipe off any leftover dust and apply the next coat. Allow it to dry and sand once again. Remember, the whole process can take several days, so be patient. The dried joint compound takes a lot of moisture therefore the repair area will require painting with a primer at first to help seal the area before painting.


